Install Ubuntu in a virtual machine
There are multiple ways to test Ubuntu. The most simple, and most dangerous is to just use your real Ubuntu machine to install and try things. I wouldn’t recommend this one to begin with, because we will be using experimental software that it’s likely to completely break your operating system every now and then.
This is not so terrible. Unless you are dealing with low-level stuff, the worst case scenario will be solved by reinstalling Ubuntu. And usually it won’t even come to that. My machines always have the unreleased unstable version of Ubuntu, and I’m often learning interesting things by trying to recover the mess I make. But let’s not get to that yet, let’s first see other options.
My preferred way to test graphical applications is to use Kernel-based Virtual Machine (KVM) and Virtual Machine Manager hosted on my real machine. A virtual machine emulates a real machine. It is completely isolated from the host where it runs, so you can freely experiment in it without the risk of breaking a machine that you will later need for something else. If things go crazy, just throw away the virtual machine and start again. The downside is that it’s slower than testing in some of the alternatives, like LXC or Docker. But I like it because it gives me an environment that’s really close to what a user would get when he installs Ubuntu on his machine. Also it’s really simple with the Virtual Machine Manager.
For this I’m going to assume that you have a machine with Ubuntu already. If you don’t have one, you can follow this guide to install Ubuntu by yourself, or you can contact somebody from your Local Community Team using the LoCo Portal. There’s always somebody who would like to meet and help a new Ubuntero or Ubuntera to get started. And in case of doubt, just ask your question in Ask Ubuntu and you will get quick help there too.
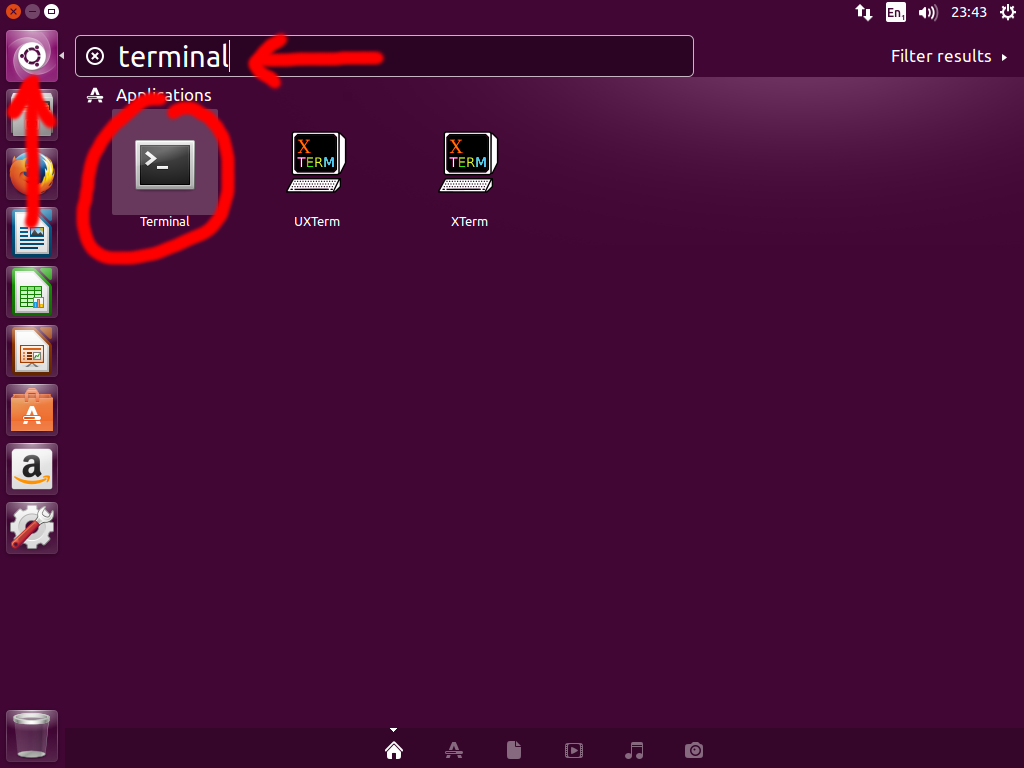
To install everything, let’s open a terminal, like Mr. Robot. Click the Ubuntu icon on the top-left of the screen, type terminal and click on the first result.
Many of the things we do with commands in the terminal can also be done using graphical applications. The terminal might seem overcomplicated at first, but soon you will notice that it’s easier to get lost trying to click buttons. In here we will do both; for some things I like commands, for some I like buttons. However, the first rule is to never enter a command that you don’t understand; and you should be specially suspicious if the command asks for your password. If you don’t understand what you are doing, search and ask.
Now, on the terminal, type:
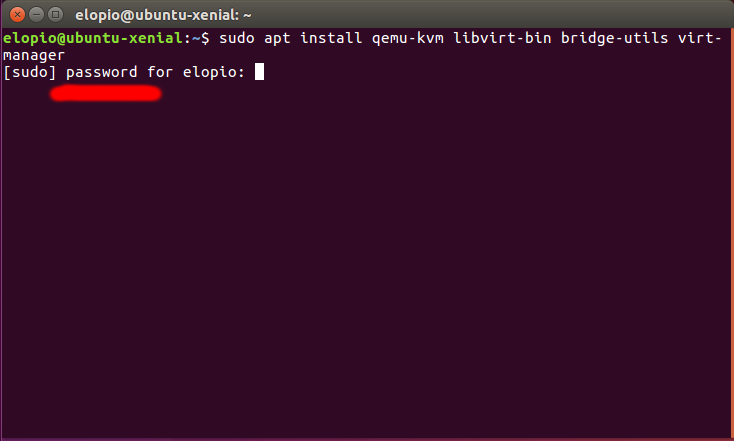
sudo apt install qemu-kvm libvirt-bin bridge-utils virt-managerAnd press enter.
sudo is the command to execute other commands as a super user. You will need super user permissions to do administrative actions on the machine, like installing new software. apt is used to manage packages. So in here we are telling the machine to install 4 packages using apt as an administrator. The 4 packages are the software we will use to create and manage virtual machines.
The first thing that sudo will do is to ask for your password.
Again, make sure that you are only following command line instructions from a trusted source, like me ^_^ And make sure that you know what you are doing before pressing enter.
Type your user password in the terminal and press enter. The password will be hidden so nobody else can see it while you are typing it, but don’t worry, after pressing enter the command will proceed with the installation.
You will know that it finished because you will be presented with a prompt again, something like user@machine:~$ which indicates that the terminal is ready to receive a new command.
Now let’s jump back to the graphical user interface. Click again the top-left Ubuntu icon, type virtual machine manager and click the first result.
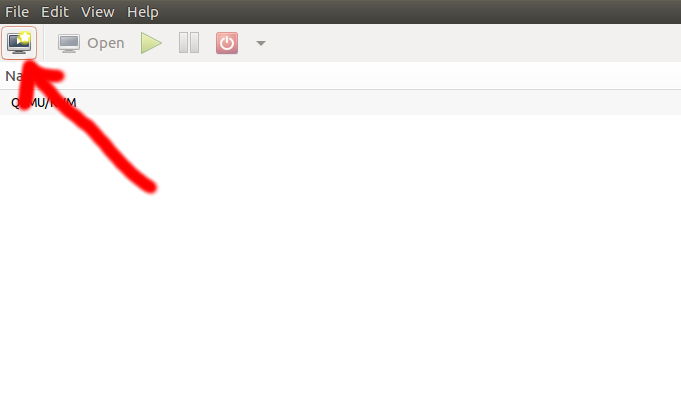
The Virtual Machine Manager window will be opened. So let’s create a new machine clicking the top-left shiny icon.
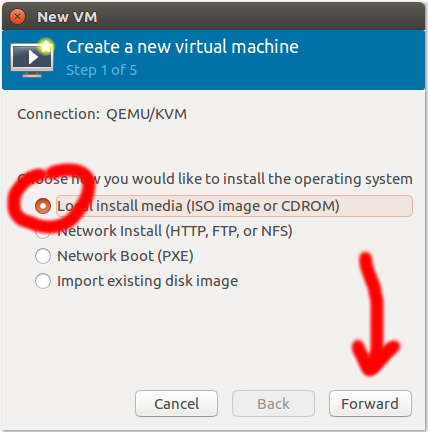
This will open a dialog to choose the installation method. We will install Ubuntu from an ISO image file. If you don’t have one, you can follow the previous guide to download the latest Ubuntu version with Long Term Support. Once you get it, select the Local install media option and click the Forward button.
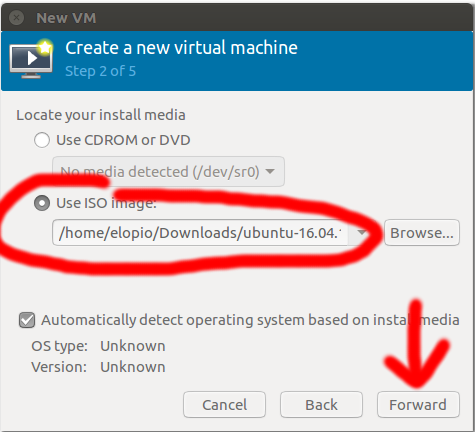
In the next dialog page, click the Browse button, which will open a new dialog. In the new one, click Browse Local, which will open yet another dialog where you should select the downloaded Ubuntu ISO file (and now you see why I said that the command line was often easier :) Back at the first dialog, clilck the Forward button.
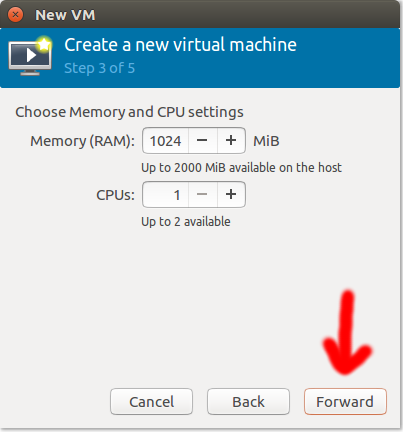
Next step is to select the amount of resources that you want to give to this virtual machine. If you give it a lot of resources, it will be faster, but then your real machine will be slower. So you have to balance both, another downside of using full virtual machines instead of ligher ways to simulate a machine. For your first machine, maybe just leave the default values. Pay attention at how the virtual and real machine feel, and next time choose a different value to compare.
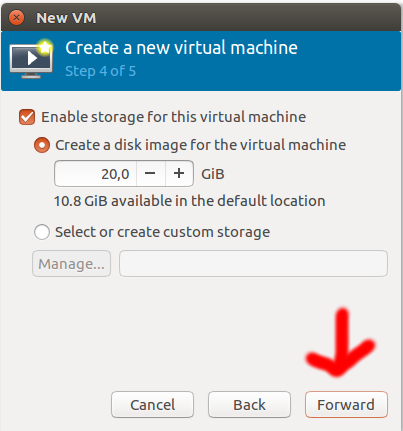
So, Forward one more time and now we can choose the size of the disk of the virtual machine. I have found that 20GiB is generally enough, and you will throw away your machine long before you fill the space. Less than that and you will likely get the disk full and will have to resize it, which is kind of boring. I will paste the command for that some other day. Forward!
And this is the last step, at least for this post. Enter a name for the virtual machine and click Finish.
Here the interesting part begins, finally. You will see the virtual machine booting, just like a real one does. It will start the live Ubuntu system, which runs from volatile memory, so you have to install it in the hard disk of the virtual machine to make it permanent. And then again, as it emulates a real machine, the steps to install Ubuntu in a virtual machine are the same to install it in a real one, so the same https://www.ubuntu.com/download/desktop/install-ubuntu-desktop guide to install a desktop machine that I linked earlier will be useful.
Once the virtual machine reboots, take some time to play with the user interface of Virtual Machine Manager. You will find controls to start, shutdown and reset the machine, and some more advanced options to change the hardware it is emulating. Remember that you can’t break your real machine, so play, make a mess, and start again.
If you want to learn some more about Ubuntu, and collaborate with the community, join us in the Ubuntu Testing Days, every Friday in Ubuntu On Air. We will use virtual machines and other tools to test cool free software projects.
