Follow this quality checklist before an audit

At OpenZeppelin we help protect the core infrastructure of open and decentralized applications. I'm part of the Research team, which is in charge of conducting security audits. We review tons of lines of code written by very smart developers for projects that will shake the foundations of our society.

Finding security vulnerabilities in this futuristic cypherpunk environment is super challenging and fun, but we have already covered those topics elsewhere. I think that security actually starts in a pretty boring and traditional place, full of the wisdom that our elders have collected through millennia of developing software in community. Standing on their shoulders, I want to share our checklist for basic quality measures that your next awesome project should consider before you hand it over for an external audit.

✔️ Choose a free software license

Closed code is inherently insecure. If people who use your project can't inspect it, study it, hack it, and experiment on it, there's no way it can be trusted. If you hold abusive control over your users, nothing prevents you (or anyone more powerful than you) from making them vulnerable.

Take a look at the Free Software Definition, and begin with choosing the license that best suits your needs.

Update: previously we introduced here Richard Stallman as a wise elder, dressed as a saint 🤦. This joke no longer seems appropriate due to his repeated bad comments, brought to light by a recent controversy. Let's just say that we thank him for having hacked copyright laws, for starting the free software movement, and for writing the above definition. And that we consider appropriate him stepping down from his leadership position in the free software community.

✔️ Build your core team of maintainers

When your project succeeds, hundreds of external contributors will surely be supporting it. But in order to get to that point, you'll need to bootstrap with a strong and diverse team of core maintainers. They'll take care of the bulk of the work, the fun and the boring parts, proposing and reviewing the code of your shared project. Together, you all need to have strong knowledge of all points on this checklist. Look not only for technical knowledge, but also for a knack for cat-herding and a healthy work style—because, well, things will get complicated.

Pay attention to your bus factor: make sure your team members are sharing their expertise, the lessons learned, and their responsibilities, while at the same time constantly mentoring new people that could potentially join the core team.

And somebody will have to lead and orchestrate in order to get value out of the eternal tendency toward chaos. Let me introduce you to the magician, Camille Fournier, who wrote THE book on technical management, The Manager's Path.

Camille Fournier

Camille Fournier (Image taken from her website)

✔️ Write clean code

The only valid measurement of code quality is WTFs per minute. This point must be simple. If things get overly complicated or weird, you're doing it wrong. Go for a walk and try again with fresh eyes.

But don't get me wrong: no interesting software project is simple. Add the complexity dimensions of decentralization, transparency, cryptography, and all these shiny ideas that are keeping us so busy these days. It's complicated by design. But with the correct abstractions, a well thought-out model, and proper encapsulation, you can start building the bank-killer app one line at a time. And each of those lines must be clean and readable.

I'm not a spectacular programmer, I was just lucky to find Uncle Bob Martin's book Clean Code at the right moment and to have read a never-ending stream of very, very ugly code.

Robert C. Martin

Robert Cecil Martin (Image taken from Wikipedia)

Once all core maintainers reach common ground on this topic, you should enforce a consistent code style by running a linter on every new line of code that's added. The particular rules aren't as important as following them strictly is, but if you can sacrifice your peculiar preferences to be consistent with the rest of the world, your contributors will appreciate it a lot.

I also practice slow-food... er, slow programming. Take your time, enjoy the journey to mastering this craft, and when you've built something you can proudly set free, let the masses read it and judge it.

✔️ Write unit tests

Write unit tests. Tons of them. 100% coverage. This might sound extreme, but hey, your code is now playing directly with somebody else's money. If you forget, or just get lazy and don't write a test for that super obvious line of code, you might be leaving an open door for an exploit later in the game that will make your project crash, and all this magic internet money will disappear in no time. It has happened.

I feel immediately more secure when I do test-driven development. At least give an honest try to writing the tests first, and get into a cycle of red-green-refactor. There are other techniques that can achieve the same result, but I suggest starting there and then deviating if you find good reasons to do so. Never worked this way? Read Test Driven Development: By Example by Kent Beck. It's a quick read that will help you avoid the temptation of just jumping into code without thinking it through.

Then, even if you design for testability, you'll find many scenarios that are hard to test. Gerard Meszaros provides all the answers in xUnit Test Patterns. This book is huge, so I recommend choosing a designated test expert on your team.

Kent Beck Gerard Meszaros

Left: Kent Beck speaking in 2001 (Image taken from Wikipedia) Right: Gerard Meszaros (Image taken from Twitter)

Finally, make sure to run your unit tests on every single pull request, and make sure they're all green before merging the changes. In addition, you can set up a test coverage report to ensure that test coverage never goes down.

✔️ Test early, test often, test agile

Now that you have your first layer of tests covered with tons of unit tests, what comes next is...more tests! You need to test the integration between all of your components, then go one level higher to test your application from the point of view of a real user, and then go even higher to test the interactions with other systems end-to-end.

To me, this is the biggest challenge, and designing a good process that keeps many bugs out of your system can be as difficult as designing the system itself. Iterate, automate as much as possible, share the load of manual testing...and let your community help.

We'll talk later about community, but I think this is the reason for publishing your code as early as possible: you can get help from early adopters and enthusiasts to validate your system, not only for correctness but also to verify that you're focusing on the right user stories and that you're tackling a real problem with a user-friendly solution.

A lot has been written about iterative development processes that deliver functionalities in progressive sprints and milestones. I found Mike Cohn's Succeeding with Agile: Software Development Using Scrum a good place to start, but keep in mind that any methodology will have to be adjusted to your team, your users, and your context. There are a lot fewer resources focused on the quality and testing part; that's why I was so happy when I read Agile Testing by Lisa Crispin and Janet Gregory, which is full of good ideas and advice. But let me stress again: nothing you read will perfectly fit your project, so take your time to design the testing process with as much love and care as you use when designing the system's architecture.

Mike Cohn Lisa Crispin and Janet Gregory

Left: Mike Cohn in 2013 (Image taken from Wikipedia) Right: Right: Lisa Crispin and Janet Gregory (Image taken from their website)

While there's still some debate about the perfect moment for auditing a project (i.e, before or after the code is published), I think audits should be performed when there's a release candidate ready to be deployed to mainnet, after you have performed extensive alpha and beta testing. I see room for auditing before the code has been published, but in this case, the audit would be more related to checking that the development process will lead to a high-quality, properly tested release candidate and validating the bases of your project than to performing a deep and thorough inspection of the codebase.

However, this doesn’t mean that you have to wait until the end of a long development phase to prepare for a release and audit. Once you start writing and testing clean code in incremental iterations, it becomes easier to think about your complex system. Many smaller independent parts will start to pop up, which can be extracted, generalized, and packaged for reuse, reducing anxiety for developers and auditors. These packages are the focus of ZeppelinOS for this year, to know more take a look at the State of EVM Packages.

✔️ Write documentation

This is my least favorite part, by far. So let's keep it simple, starting at the beginning: the README, the most important file of your repository. And yet, it's usually either empty or bloated, outdated, and ugly. Ideally, as it's the first thing developers and potential contributors will read, it should work as a clear, straightforward index of your project.

It's best not to get creative here. Just follow this simple specification that works for all cases, proposed by Richard Littauer in Standard Readme. Do not forget to include a specific section in the main README that states how people should disclose any security vulnerabilities found in your project.

Richard Littauer

Richard Littauer (Image taken from Twitter)

Next come the docstrings, the documentation inside your code files. We hit an apparent conflict here, since in theory, if your code is clean, it will not require documentation. However, note that we are no longer designing standalone systems that work as a black box. We are building protocols for decentralized applications, and your code will be called by all sorts of external agents. So by all means, document every function that's part of the contract's public API, following the NatSpec format.

Which brings me to the next point. I highly recommend that you document the specification of your protocol—that's how others will know what to call and what to expect. But more related to the topic at hand, in an audit, we check that the implemented code works as intended by the specification. That's why this document is a must: without it, auditors will just guess at your intentions, which might result in some issues getting missed because they're completely consistent within the system but take it to a state that you want to avoid.

Finally, there's the user documentation. For high-quality systems, writing the user documentation should be mostly painless. The moment things get cumbersome while documenting, consider re-evaluating your user stories, and don't be afraid to go back to iterate on them.

✔️ Check your dependencies

Your project builds on top of many, many others. It will probably depend at least on the Ethereum protocol and its network of nodes, and on Solidity, a bunch of Ethereum Improvement Proposals and their implementation, libraries for testing and UI, and maybe hundreds of other small projects. Even if yours is secure, you need to check how healthy your dependencies are, since they can easily become the source of vulnerabilities.

Earlier, I mentioned that your team should have strong and diverse knowledge. That includes knowledge of all the projects that surround you. You should be able to write idiomatic code following the best practices of the language, to identify and avoid known issues, always keeping an eye on new CVEs that may directly (or indirectly, through third-party dependencies) affect your project. Moreover, try to participate in the communities around your dependencies, as it's an excellent way to see firsthand how safe and trustworthy they are. You should also consider actively participating in those communities, to gain some karma that will surely come in handy later when you need new features and bug fixes.

Moreover, don't forget to pay attention to your dependencies' finances. When making your project's budget, take into account a share for your dependencies, as they may need it in order to remain actively maintained. There's a very nice project called OpenCollective, led by Pia Mancini, which is making it extremely easy to transparently support the organizations and developers you depend on.

Pia Mancini

Pia Mancini (Image taken from her website)

And, of course, with ZeppelinOS, we're building a platform that will let you vouch for the security of a package. It's in beta testing, so expect exciting news very soon.

Specific to Ethereum and Solidity, the community is collecting the lessons learned (usually in a painful way). You can learn a lot about interesting and tricky vulnerabilities playing the Ethernaut capture-the-flag game. We've published many of our past audits with descriptions of the issues found, recommendations, and usually a link to the patch that fixes them. All of our learnings from audits are distilled into the OpenZeppelin package, which you should definitely add to your list of dependencies—if you're not one of the thousands that already did. The Smart Contracts Weakness Registry maintained by the Mythril team is also a great resource for learning from the experience of others.

Whatever approach you take, remember that as the Ethereum space is very young and unexplored, we're learning many things as we go, so always proceed with caution.

✔️ Build your community

This is a complement to the first point: code without a community is insecure. The community gives you eyes to monitor the project, hands to test it in a real environment, support to survive challenging problems, and resilience to adjust to the unexpected. No amount of money, experience, or knowledge can substitute for this.

Once you publish the code, you can get started engaging your community. If your project is interesting, they will come, and this is where the cat-herding abilities of your team will shine. However, you definitely need to set up proper and fluent communication channels, invest in some marketing, and hire a bold community manager with a plan to disentangle and wisely leverage all the opportunities your community brings. I can't recommend highly enough the writings and videos by Jono Bacon, who has covered all the topics you can imagine about community management.

Jono Bacon

Jono Bacon in 2014 (Image taken from Flickr)

You should be thoughtful and caring with your community. A small step that goes a long way is to adopt and enforce a code of conduct so you can all feel safe. Then, write some contribution guidelines to make sure that all of their enthusiasm can be put to good use and they don't get lost. Lastly, think about setting up a bug bounty program that will encourage your community to watch out for vulnerabilities in the wild, providing hackers with enough incentives to disclose security issues in a responsible way.


tldr:

✅ Choose a free software license.

✅ Build a strong and diverse team of core maintainers.

✅️ Increase your bus factor: share knowledge and responsibilities.

✅ Choose a good leader.

✅️ Write clean code.

✅️ Enforce a consistent code style.

✅️ Ensure 100% unit test coverage.

✅️ Enforce green tests on all your pull requests.

✅️ Design your iterative development and testing process.

✅️ Publish your code.

✅️ Write a good README.

✅️ Document the functions of your public API.

✅️ Document your protocol.

✅️ Write the end-user documentation.

✅️ Make sure that your dependencies can be trusted.

✅️ Review known issues and keep an eye out for new ones.

✅️ Use OpenZeppelin, the community-vetted standard for smart contract development.

✅️ Build and care for your community.


Ready to hire an auditing team?

That's us! :) The OpenZeppelin team can help you assess the quality of your project and processes. We'll take a deep and thorough dive into your code, with years of experience hacking, researching, and developing on blockchains, plus a little touch of Latin American fire, to give you and your users all the confidence you need to continue building the core systems of this new decentralized, global, and open economy.

We're available for auditing services, so check out this information about security audits.

Thanks to Martín Abbatemarco for editing this post, to the OpenZeppelin team for the continuous experimentation and feedback, and to our customers for trusting us and helping us better understand what makes a free software project awesome.


Be part of our community

On crowdsales and multiple inheritance

On 2017 we saw a mind-blowing number of crowdsales and ICOs running in the Ethereum blockchain. They have proven to be a powerful tool to collect the funds required to start a project, and they are one of the most common uses for smart contracts right now. The Zeppelin team has been very involved in this topic, auditing many crowdsale contracts, and supporting OpenZeppelin, the most popular framework to build these crowdsales. What we found was a lot of contracts repeating the same basic concepts, with very similar code, and common vulnerabilities.

Earlier this year, part of the team took the task to redesign our base Crowdsale contract in order to support a lot of new crowdsale flavors out of the box and to make the experience of building and publishing your own crowdsale more clear and secure. The idea is to make audits less necessary, with an architecture that is modular, that encourages reuse and that will be collectively reviewed. These new contracts were added to OpenZeppelin version 1.7.0, and since the release they have been widely used by our community with great success. So, this is a good moment to show off :)

Let's start with a dive into the source code of the Crowdsale base contract. The first thing you will notice is a lot of comments, guiding you through the details of the OpenZeppelin crowdsale architecture. They explain that some functions are the core of the architecture and should not be overriden, like buyTokens. Some others like _preValidatePurchase can be overriden to implement the requirements of your crowdsale, but that extra behavior should be concatenated with the one of the parent by calling super, to preserve the validations from the base contract. Some functions like _postValidatePurchase can be just added as hooks in other parts of the crowdsale's lifecycle.

Building on top of this base, we now provide some contracts for common crowdsale scenarios involving distribution, emission, price, and validation.

So, let's say that you want to set a goal for your crowdsale and if it's not met by the time the sale finishes, you want to refund all your investors. For that, you can use the RefundableCrowdsale contract, which overrides the base _forwardFunds behavior to send the funds to a fancy RefundVault while the crowdsale is in progress, instead of sending them directly to the wallet of the crowdsale owner.

Another common scenario is when you want the tokens to be minted when they are purchased. For that, take a look at the MintedCrowdsale contract, which overrides the simple _deliverTokens behavior of the base class to call instead the mint function of an ERC20 Mintable token.

What if we want to do something more interesting with the price of the tokens? The base Crowdsale contract defines a constant rate between tokens and wei, but if we override _getTokenAmount, we could do something like increasing the price as the closing time of the crowdsale approaches. That's exactly what the IncreasingPriceCrowdsale contract does.

To get started developing and deploying a crowdsale using the OpenZeppelin framework, Gustavo Guimaraes published a nice guide where you will see in action a crowdsale that is timed and minted.

These are just a few examples. I invite you to explore the OpenZeppelin crowdsale contracts to see all the new flavors that you can easily use to fund your cool idea; and take a look at the SampleCrowdsale contract, a more complex scenario that comes with full test coverage. If you like OpenZeppelin, remember that you are welcome into our vibrating community to help us adding new contracts or improving the existing ones.

On the repo you will also find that all these contracts are very well tested. And as we have seen, the new architecture is clearer and safer, with each contract explaining the functions that you can or can't override, and how to do it. However, you should be extra careful when combining them. It's not the same to have three contracts with one condition than to have one contract with three conditions. The combination increases the attack surface, so you need to have a good idea of what you want to achieve, and know the implementation details of the tools you are using.

Before you go ahead and deploy a complex crowdsale that combines some of our contracts, I would like to spend some time going deep into how Solidity works when you combine contracts through multiple inheritance, like Gustavo did in his guide to make a contract that inherits from TimedCrowdsale and from MintedCrowdsale.

Multiple inheritance is hard, and it can get very confusing if you abuse it. Some languages don't support it at all; but it is becoming a very common pattern on Solidity.

The problem, from the point of view of the programmer, is to understand the order of the calls when a contract has multiple parents. Let's say we have a base contract A, with a function named f:

contract A {
  function f() {
    somethingA();
  }
}

Then we have two contracts B and C, both inherit from A and override f:

contract B is A {
  function f() {
    somethingB();
    super.f();
  }
}

contract C is A {
  function f() {
    somethingC();
    super.f();
  }
}

And finaly we have a contract D, which inherits from B and C, and overrides f too:

contract D is B, C {
  function f() {
    somethingD();
    super.f();
  }
}

What happens when you call D.f?

This is called the diamond problem, because we end up with a diamond-shaped inheritance diagram:

Diamond inheritance problem

(the image is from wikipedia)

To solve it, Solidity uses C3 linearization, also called Method Resolution Order (MRO). This means that it will linearize the inheritance graph. If D is defined as:

contract D is B, C {}

then D.f will call:

somethingD();
somethingC();
somethingB();
somethingA();

When D inherits from B, C, the linearization results in D→ C→ B→ A. This means that super on D calls C. And you might be a little surprised by the fact that calling super on C will result on a call to B instead of A, even though C doesn't inherit from B. Finally, super on B will call A.

If D is instead defined as:

contract D is C, B {}

then D.f will call:

somethingD();
somethingB();
somethingC();
somethingA();

When D inherits from C, B, the linearization results in D→ B→ C→ A.

Notice here that the order in which you declare the parent contracts matters a lot. If the inheritance graph is not too complex, it will be easy to see that the order of calls will follow the order in which the parents were declared, right to left. If your inheritance is more complicated than this and the hierarchy is not very clear, you should probably stop using multiple inheritance and look for an alternate solution.

I recommend you to read the wikipedia pages of Multiple inheritance and C3 linearization, and the Solidity docs about multiple inheritance. You will find in there a complete explanation of the C3 algorithm, and an example with a more complicated inheritance graph.

To better understand how this can impact your crowdsales, take a look at the case that Philip Daian brilliantly explains on his blog post Solidity anti-patterns: Fun with inheritance DAG abuse. There, he presents a Crowdsale contract that needs "to have a whitelist pool of preferred investors able to buy in the pre-sale [...], along with a hard cap of the number of [...] tokens that can be distributed." On his first (deliberately) faulty implementation, he ends up with a crowdsale that checks:

((withinPeriod && nonZeroPurchase) && withinCap) || (whitelist[msg.sender] && !hasEnded())

Pay close attention to the resulting condition, and notice that if a whitelisted investor buys tokens before the crowdsale has ended, she will be able to bypass the hard cap, and buy as many tokens as she wants.

By just inverting the order on which the parents are defined, he fixes the contract which will now check for:

(withinPeriod && nonZeroPurchase || (whitelist[msg.sender] && !hasEnded())) && withinCap

Now, if the purchase attempt goes above the cap, the transaction will be reverted even if the sender is whitelisted.

There are some simple cases, where the order of the conditions is not important. By now, you should have started to suspect that the contract above became complicated because of the || (or) condition. Things are a lot easier when all our conditions are merged with && (and), because in that case the order of the conditions doesn't alter the result.

Our new architecture was crafted for using require instead of returning booleans, which works nicely to combine and conditions, and to revert the transaction when one fails. Let's say that we have a crowdsale that should only allow whitelisted investors to buy tokens while the sale is open and the cap has not been reached. In this case, the condition to check would be (in pseudocode):

require(hasStarted() && !hasEnded())
require(isInWhiteList(msg.sender))
require(isWithinCap(msg.value))

Our contract would be as simple as:

pragma solidity ^0.4.18;

import "zeppelin-solidity/contracts/crowdsale/validation/TimedCrowdsale.sol";
import "zeppelin-solidity/contracts/crowdsale/validation/WhitelistedCrowdsale.sol";
import "zeppelin-solidity/contracts/crowdsale/validation/CappedCrowdsale.sol";

contract WhitelistedTimedCappedCrowdsale is TimedCrowdsale, WhitelistedCrowdsale, CappedCrowdsale {

  function WhitelistedTimedCappedCrowdsale(
    uint256 _rate,
    address _wallet,
    ERC20 _token,
    uint256 _openingTime,
    uint256 _closingTime,
    uint256 _cap
  )
    public
    Crowdsale(_rate, _wallet, _token)
    TimedCrowdsale(_openingTime, _closingTime)
    CappedCrowdsale(_cap)
    {
    }

}

It doesn't matter how you order the parents, all the conditions will be checked always. But take this with a grain of salt. All the conditions will be checked, but the order will be different. This can have different side-effects on Solidity, as some paths will execute statements that other paths won't, and it could lead an attacker to find a specific path that is vulnerable. Also, if your parent contracts are not super clear, they might be hiding an || condition in a few hard-to-read code statements.

It's very easy to think that the parent contracts will just be magically merged into something that will make sense for our use case, or to make a mistake when we linearize them in our mind. Every use case will be different, so our framework can't save you from the work of organizing your contracts' hierarchy. You must analyze the linearization of the inheritance graph to get a clear view of the functions that will be called and their order, and always always add a full suite of automated tests for your final crowdsale contract to make sure that it enforces all the conditions.

To finish, I wanted to show you my repo where I will be doing experiments with crowdsales and their tests: https://github.com/elopio/zeppelin-crowdsales

Take a look at my PreSaleWithCapCrowdsale contract. You will see that I preferred to be explicit about the conditions instead of using super:

function _preValidatePurchase(address _beneficiary, uint256 _weiAmount) internal {
  require(_beneficiary != address(0));
  require(_weiAmount != 0);
  require(block.timestamp >= openingTime || whitelist[_beneficiary]);
  require(block.timestamp <= closingTime);
  require(weiRaised.add(_weiAmount) <= cap);
}

I encourage you to join me on these experiments, to try different combinations of crowdsales and to play switching the order of the inheritance graph. We will learn more about the resulting code that Solidity compiles, we will improve our mental picture of the execution stack, and we will practice writing tests that fully cover all the possible paths. If you have questions, find errors on the implementations in OpenZeppelin, or find an alternative implementation that will make it easier to develop crowdsales on top of our contracts, please let us know by sending a message to the slack channel. I am elopio in there.

A relevant experiment here is to use composition over inheritance. In OpenZeppelin we couldn't implement an architecture based on composition because of the high gas costs implied, especially during deployment. That is one of the reasons we are now hard at work on zeppelin_os, which minimizes deployment costs by helping you use libraries that are already on-chain. Expect exciting news very soon!

Thanks a lot to Ale and Alejo, who worked on these new contracts and helped me to understand them. <3

Punto de partida y regreso: Costa Rica

por Carmen Naranjo

En cualquier parte del mundo
amanezco y anochezco
costarricense
con esa forma cortés
que cree en lo bueno
y sigue creyendo
después de la burla
y de la estafa.
No podría inventar mi tierra
porque la llevo
enredada en el alma.
No soy consciente
de lo que es ser costarricense
pero inconscientemente
por cada poro se me sale
y hasta sueño universos
con sus siluetas de montañas.
Cuando veo un mapa
siento que todo el país
me cabe en el puño cerrado
aunque sea una tierra
con la mano abierta.
No sé ni me importa
como la ve un extranjero.
Sé que es mi paisaje
el lugar donde duermo
y a veces oigo que me
canta canciones de cuna.
Hay días que me levanto
para admirarla
y se me hace luz
y fiesta de lluvias.
Hay días que no la veo,
la habito como la casa propia
que a veces no se siente.
Otros días se me hace silencio
y me agobia
con su mecanismo de cosa conocida.

Desde el avión es continente
y de regreso rincón dulce.
Dicen que somos mediocres
porque aquí todo es suave,
pasan cosas poco interesantes,
un crimen pasional duerme en las calles,
un chisme interrumpe esquinas,
una anécdota deshace prestigios
y una democracia de votos y libertades
navega sobre dependencias.
Somos pobres con terror de pobrezas
y a veces somos ricos en sueños,
cada uno quiere casa y parcela,
nombre y renombre fáciles,
cada quien ambiciona aire,
cielo azul y patria con pan
y algo más por si acaso.
No es extraño que lo extraño
asuste un poco
y asusta mucho
que asuste tanto
el quebrar hipocresías
y el deshacer eslogans
que es una forma de ser
sin ser en realidad lo que se es.
En cierta forma igual
a cualquier tierra del mundo.
Se encumbran conceptos de patria
y la patria es simple:
un lugar donde alguien te conoce
y a lo mejor te quiere.
Aquí en esta tierra
pronto tendrás lugar,
alguien que te conozca
y a lo mejor te quiera.

Don Gerardo Bolaños escribió sobre este poema, y otras cosas, aquí.

Quipus incas y cifrado con factorización de números primos

Dibujo de un inca y su quipu

Según este sabio [Nordenskiöld], los indios colocaban en las tumbas únicamente quipus con números que a sus ojos tenían valor mágico, expresándolos no en forma directa sino mediante otros que los incluyen o que son sus múltiplos y tratando de hacerlos coincidir con la numeración resultante de cálculos obtenidos de la consulta de los astros. [...]. La finalidad que llevó a los indios a tal práctica fue entretener, mediante estos complicados «rebus», a los espíritus malignos, quienes se esforzarían para desanudar las cuerdas y encontrar esta numeración mágica [...].

en Estudio sobre los quipus, de Carlos Radicati di Primeglio.

Y así fue como lxs incas inventaron el cifrado con factorización de números primos, la base de todas las comunicaciones seguras y criptomonedas de hoy. :D

San José participará en #CompletetheMap, para mejorar el mapa de la ciudad entre todes

Mapillary por primera vez ha lanzado un reto global de captura de imágenes. Desde el 11 de diciembre hasta el 31 de enero, San José estará participando en #CompletetheMap para completar su mapa capturando fotos con las herramientas de Mapillary, junto a ciudades, pueblos y lugares remotos de todo el mundo.

Mapillary es una plataforma colaborativa que permite visualizar el mundo con fotos a nivel de la calle. Las fotos son contribuidas por una amplia gama de fuentes, incluyendo personas, gobiernos, agencias humanitarias y empresas de mapas. Las fotos luego son procesadas por Mapillary para extraer datos geográficos como límites de velocidad, giros prohibidos, ciclovías y la cantidad de vegetación en un lugar. Por estas razones, se ha convertido en una herramienta popular en la comunidad de OpenStreetMap, un proyecto de código abierto que se basa en personas editoras voluntarias para crear el mapa del mundo.

Algunos usos prácticos de estos datos incluyen el análisis de la infraestructura para bicicletas a lo largo de una ciudad, reducción de riesgos antes y después de desastres, movilidad urbana, y puntos de reunión. #CompletetheMap viene a impulsar este estilo rápido de recolección de datos en un área específica. La idea de #CompletetheMap es simple. El área seleccionada se divide en zonas, y personas miembros de la comunidad local colaboran para capturar imágenes en cada zona. Conforme el porcentaje de fotos de calles y caminos aumenta, la zona cambia de color de rojo a naranja, y de naranja a verde.

El reto #CompletetheMap empezó en mayo de este año y ya se ha realizado en ciudades como Brasilia, Moscú, Berlín y Ottawa.

Cada una de estas ciudades ha respondido en su propia forma, reuniendo a la comunidad y mostrando la gran cantidad de datos que incluso un pequeño grupo de personas puede recolectar. Brasilia se ha concentrado en características de calles y puntos de interés. Moscú se reunió para capturar fotos de algunas de las carreteras más nuevas alrededor del centro de la ciudad. Berlín, la primera en participar en el reto de #CompletetheMap, ayudó a prepararlo recolectando muchas de las calles más pequeñas y rutas peatonales. Luego está Ottawa, un #CompletetheMap centrado en infraestructura para bicicletas. En este reto, 20 personas lograron recolectar medio millón de imágenes y casi 2000 km de cobertura nueva.

El reto global le permite a cualquier persona seguir su progreso relativo a otras alrededor del mundo, recolectando fotos en un área de 50 km2. Las participantes pueden ganar aumentando los km de nuevas rutas que capturan, la cantidad de imágenes que toman, y el número de participantes que se unen para ayudarles.

CompletetheMap

Actualmente, 23 ciudades de 17 países se han registrado para el #CompletetheMap global.

Todo lo que se necesita para colaborar es un teléfono celular. Participe en el reto descargando la aplicación de Mapillary y tomando fotos de las calles por las que viaja. Una vez que se conecte a una red wifi, suba las imágenes y véalas aparecer en Mapillary.com.

Puede unirse a la comunidad de maperos y maperas de Costa Rica en https://www.facebook.com/maperespeis/

The dream ship

I was brought here by a
cat, although I do not
remember where the cat found
me, and I do not know where
I am now. A vessel of some
kind. A ship, perhaps.

When I walk on deck, there
is nothing but mist. There
is also nowhere to fit
a thousand of us.

But beneath the
decks there is a
hall. It changes:

sometimes it
is jungle,

sometimes,
theatre,

sometimes a
banqueting
place,

sometimes a
parliament.

I am reminded of a house in a
dream. Nothing is consistent,
save for the essence of the place.

We are friends here on this vessel,
and we do not harm each other.

And this is odd.
We are not of the same
species, or even the same
order of things. We
cannot exist in one
place together.

Rr'arr'rr'll is a
floating jelly-balloon
from a gas-giant
world.

Lo Sharforth
is a superheated
glob of solar
plasma, a
thousand
miles
across.

The Rising is a
bacteria complex,
one of the
universe's greatest
mathematicians, yet
immediately lethal
to the majority of
life-forms it
encounters.

But we are
all here.

I wonder what
they see.

I wonder how
they'll talk.

I wish I could
remember my
name.

on The Sandman Overture, Chapter Six, by Neil Gaiman

An errbot snap for simplified chatops

I'm a Quality Assurance Engineer. A big part of my job is to find problems, then make sure that they are fixed and automated so they don't regress. If I do my job well, then our process will identify new and potential problems early without manual intervention from anybody in the team. It's like trying to automate myself, everyday, until I'm no longer needed and have to jump to another project.

However, as we work in the project, it's unavoidable that many small manual tasks accumulate on my hands. This happens because I set up the continuous integration infrastructure, so I'm the one who knows more about it and have easier access, or because I'm the one who requested access to the build farm so I'm the one with the password, or because I configured the staging environment and I'm the only one who knows the details. This is a great way to achieve job security, but it doesn't lead us to higher quality. It's a job half done, and it's terribly boring to be a bottleneck and a silo of information about testing and the release process. All of these tasks should be shared by the whole team, as with all the other tasks in the project.

There are two problems. First, most of these tasks involve delicate credentials that shouldn't be freely shared with everybody. Second, even if the task itself is simple and quick to execute, it's not very simple to document how to set up the environment to be able to execute them, nor how to make sure that the right task is executed in the right moment.

Chatops is how I like to solve all of this. The idea is that every task that requires manual intervention is implemented in a script that can be executed by a bot. This bot joins the communication channel where the entire team is present, and it will execute the tasks and report about their results as a response to external events that happen somewhere in the project infrastructure, or as a response to the direct request of a team member in the channel. The credentials are kept safe, they only have to be shared with the bot and the permissions can be handled with access control lists or membership to the channel. And the operative knowledge is shared with all the team, because they are all listening in the same channel with the bot. This means that anybody can execute the tasks, and the bot assists them to make it simple.

In snapcraft we started writing our bot not so long ago. It's called snappy-m-o (Microbe Obliterator), and it's written in python with errbot. We, of course, packaged it as a snap so we have automated delivery every time we change it's source code, and the bot is also autoupdated in the server, so in the chat we are always interacting with the latest and greatest.

Let me show you how we started it, in case you want to get your own. But let's call this one Baymax, and let's make a virtual environment with errbot, to experiment.

drawing of the Baymax bot

$ mkdir -p ~/workspace/baymax
$ cd ~/workspace/baymax
$ sudo apt install python3-venv
$ python3 -m venv .venv
$ source .venv/bin/activate
$ pip install errbot
$ errbot --init

The last command will initialize this bot with a super simple plugin, and will configure it to work in text mode. This means that the bot won't be listening on any channel, you can just interact with it through the command line (the ops, without the chat). Let's try it:

$ errbot
[...]
>>> !help
All commands
[...]
!tryme - Execute to check if Errbot responds to command.
[...]
>>> !tryme
It works !
>>> !shutdown --confirm

tryme is the command provided by the example plugin that errbot --init created. Take a look at the file plugins/err-example/example.py, errbot is just lovely. In order to define your own plugin you will just need a class that inherits from errbot.BotPlugin, and the commands are methods decorated with @errbot.botcmd. I won't dig into how to write plugins, because they have an amazing documentation about Plugin development. You can also read the plugins we have in our snappy-m-o, one for triggering autopkgtests on GitHub pull requests, and the other for subscribing to the results of the pull requests tests.

Let's change the config of Baymax to put it in an IRC chat:

$ pip install irc

And in the config.py file, set the following values:

BACKEND = 'IRC'
BOT_IDENTITY = {
    'nickname' : 'baymax-elopio',  # Nicknames need to be unique, so append your own.
                                   # Remember to replace 'elopio' with your nick everywhere
                                   # from now on.
    'server' : 'irc.freenode.net',
}
CHATROOM_PRESENCE = ('#snappy',)

Run it again with the errbot command, but this time join the #snappy channel in irc.freenode.net, and write in there !tryme. It works ! :)

screenshot of errbot on IRC

So, this is very simple, but let's package it now to start with the good practice of continuous delivery before it gets more complicated. As usual, it just requires a snapcraft.yaml file with all the packaging info and metadata:

name: baymax-elopio
version: '0.1-dev'
summary: A test bot with errbot.
description: Chat ops bot for my team.
grade: stable
confinement: strict

apps:
  baymax-elopio:
    command: env LC_ALL=C.UTF-8 errbot -c $SNAP/config.py
    plugs: [home, network, network-bind]

parts:
  errbot:
    plugin: python
    python-packages: [errbot, irc]
  baymax:
    source: .
    plugin: dump
    stage:
      - config.py
      - plugins
    after: [errbot]

And we need to change a few more values in config.py to make sure that the bot is relocatable, that we can run it in the isolated snap environment, and that we can add plugins after it has been installed:

import os

BOT_DATA_DIR = os.environ.get('SNAP_USER_DATA')
BOT_EXTRA_PLUGIN_DIR = os.path.join(os.environ.get('SNAP'), 'plugins')
BOT_LOG_FILE = BOT_DATA_DIR + '/err.log'

One final try, this time from the snap:

$ sudo apt install snapcraft
$ snapcraft
$ sudo snap install baymax*.snap --dangerous
$ baymax-elopio

And go back to IRC to check.

Last thing would be to push the source code we have just written to a GitHub repo, and enable the continuous delivery in build.snapcraft.io. Go to your server and install the bot with sudo snap install baymax-elopio --edge. Now everytime somebody from your team makes a change in the master repo in GitHub, the bot in your server will be automatically updated to get those changes within a few hours without any work from your side.

If you are into chatops, make sure that every time you do a manual task, you also plan for some time to turn that task into a script that can be executed by your bot. And get ready to enjoy tons and tons of free time, or just keep going through those 400 open bugs, whichever you prefer :)

Deploy to all SBCs with Gobot and a single snap package

I love playing with my prototyping boards. Here at Ubuntu we are designing the core operating system to support every single-board computer, and keep it safe, updated and simple. I've learned a lot about physical computing, but I always have a big problem when my prototype is done, and I want to deploy it. I am working with a Raspberry Pi, a DragonBoard, and a BeagleBone. They are all very different, with different architectures, different pins, onboard capabilities and peripherals, and they can have different operating systems. When I started learning about this, I had to write 3 programs that were very different, if I wanted to try my prototype in all my boards.

picture of the three different SBCs

Then I found Gobot, a framework for robotics and IoT that supports my three boards, and many more. With the added benefit that you can write all the software in the lovely and clean Go language. The Ubuntu store supports all their architectures too, and packaging Go projects with snapcraft is super simple. So we can combine all of this to make a single snap package that with the help of Gobot will work on every board, and deploy it to all the users of these boards through the snaps store.

Let's dig into the code with a very simple example to blink an LED, first for the Raspberry PI only.

package main

import (
  "time"

  "gobot.io/x/gobot"
  "gobot.io/x/gobot/drivers/gpio"
  "gobot.io/x/gobot/platforms/raspi"
)

func main() {
  adaptor := raspi.NewAdaptor()
  led := gpio.NewLedDriver(adaptor, "7")

  work := func() {
    gobot.Every(1*time.Second, func() {
      led.Toggle()
    })
  }

  robot := gobot.NewRobot("snapbot",
    []gobot.Connection{adaptor},
    []gobot.Device{led},
    work,
  )

  robot.Start()
}

In there you will see some of the Gobot concepts. There's an adaptor for the board, a driver for the specific device (in this case the LED), and a robot to control everything. In this program, there are only two things specific to the Raspberry Pi: the adaptor and the name of the GPIO pin ("7").

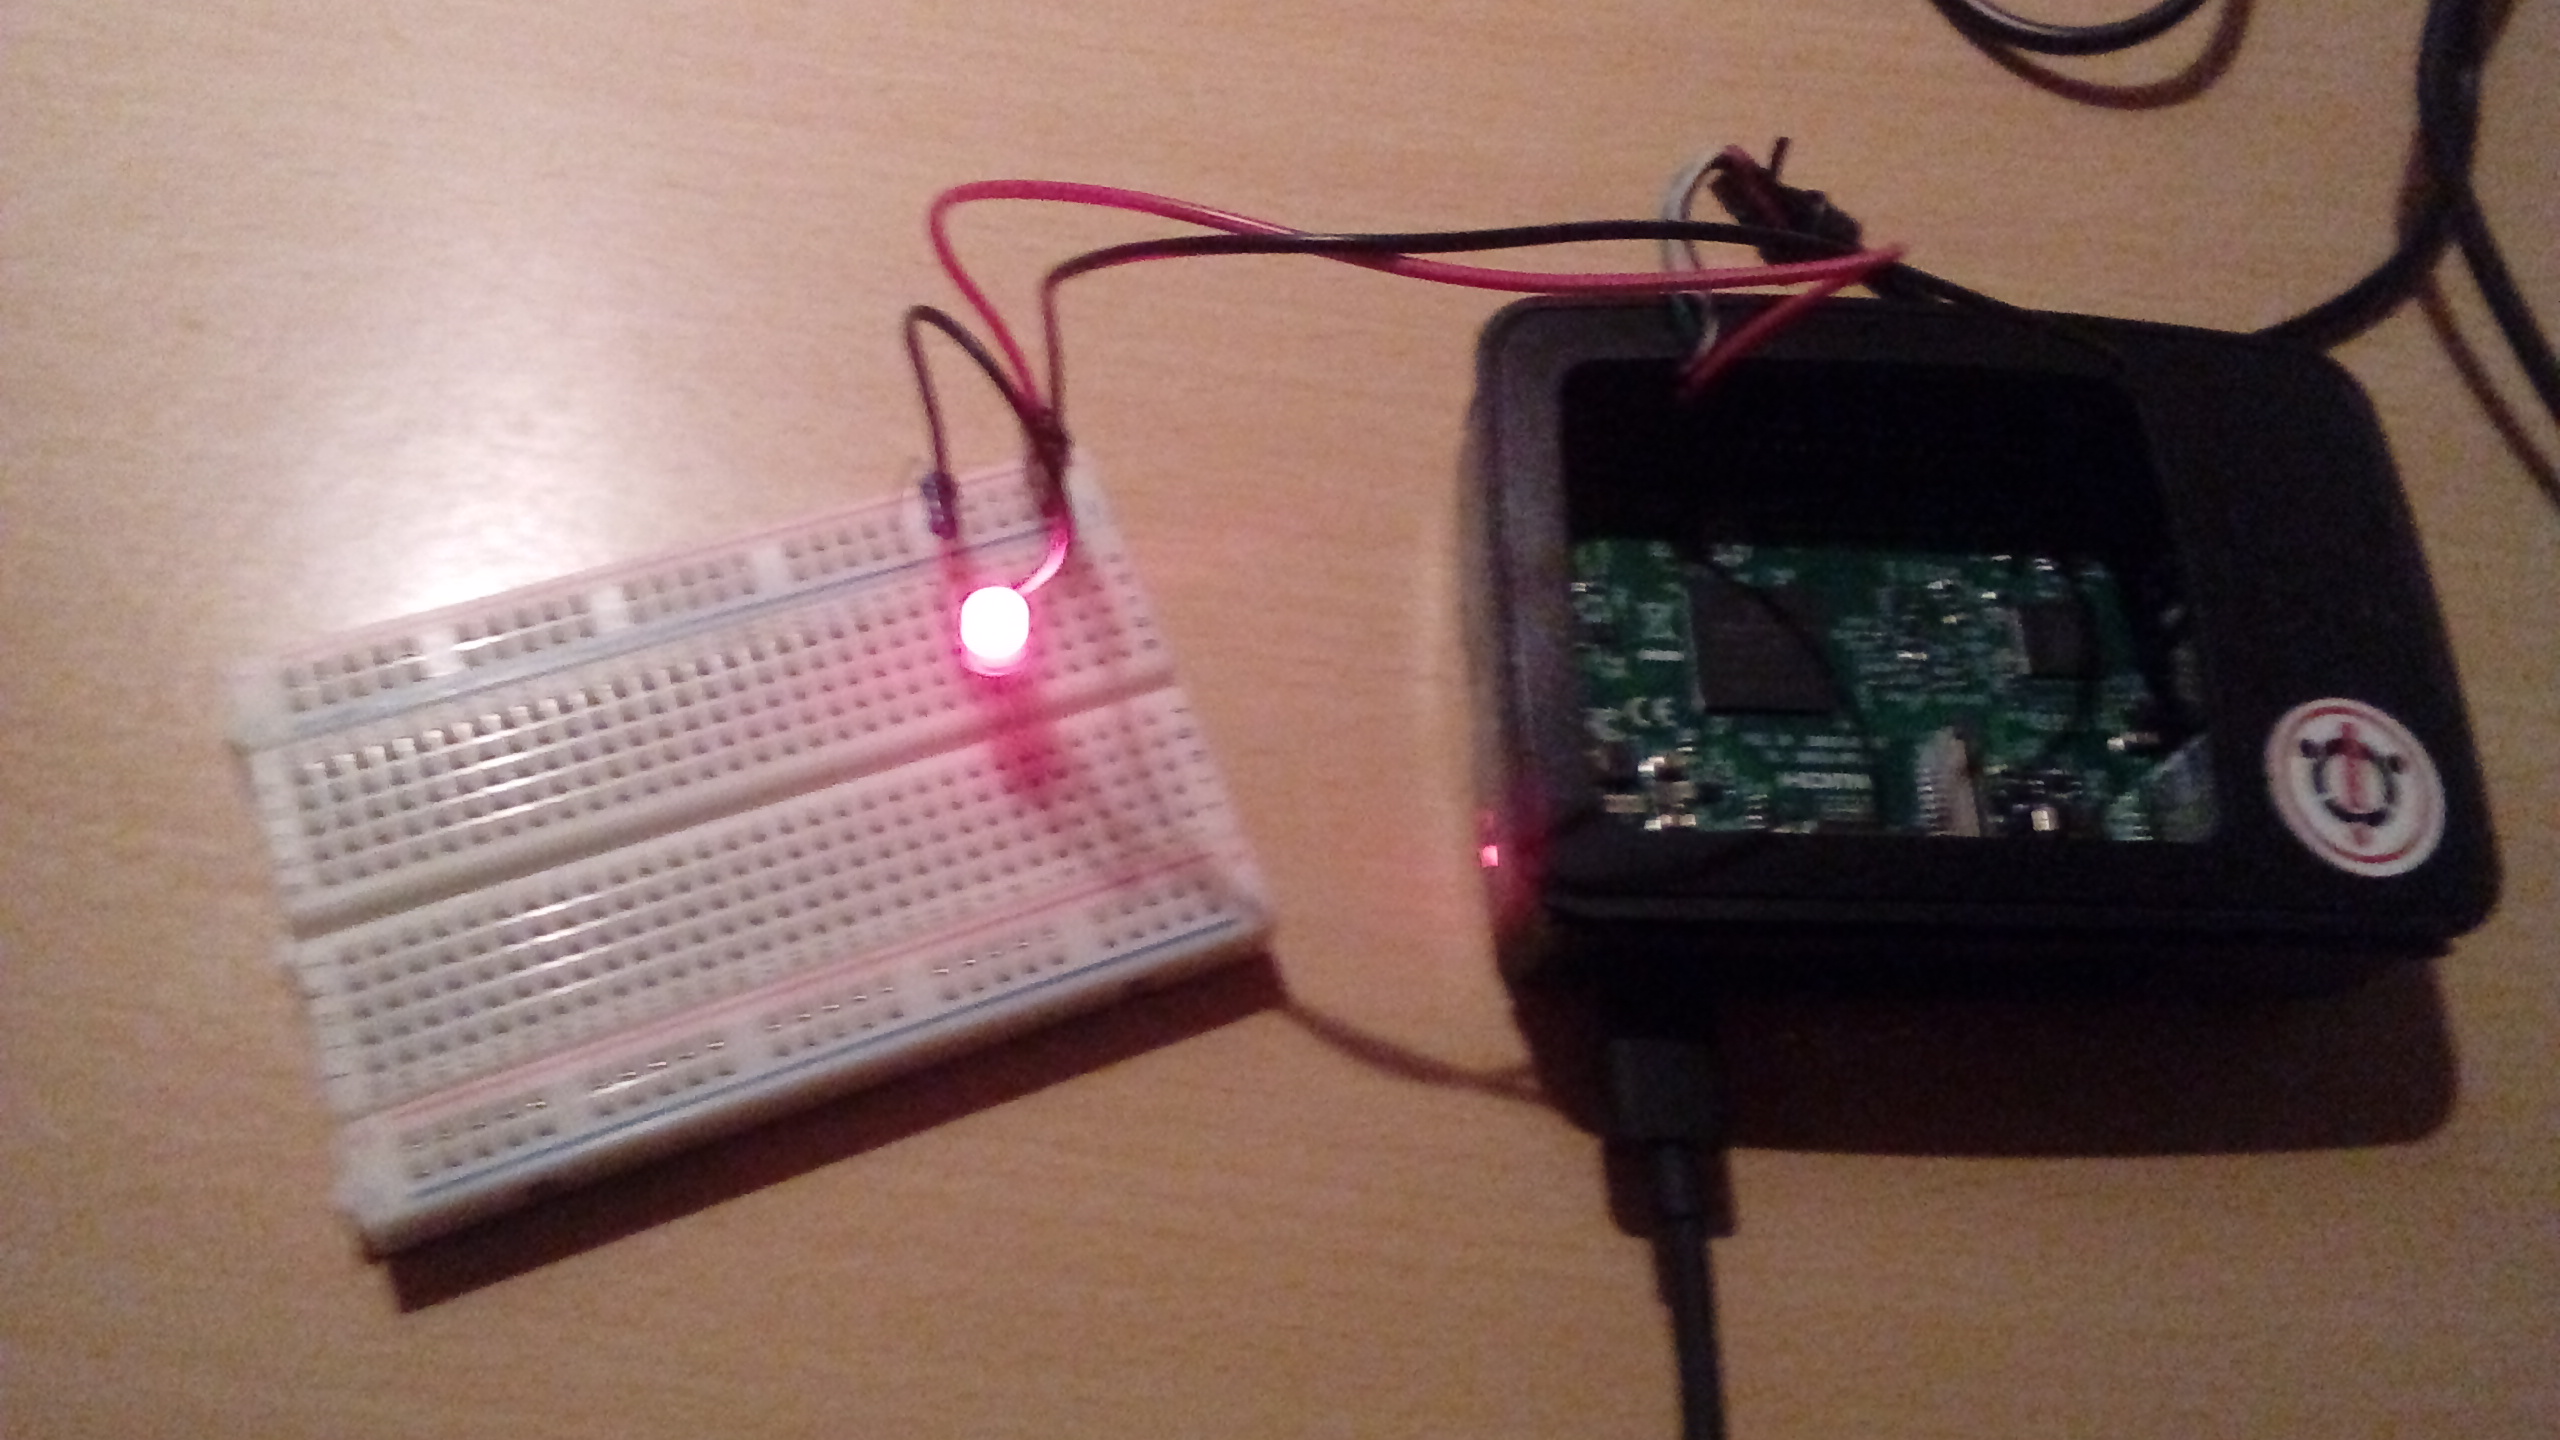
picture of the Raspberry Pi prototype

It works nicely in one of the boards, but let's extend the code a little to support the other two.

package main

import (
  "log"
  "os/exec"
  "strings"
  "time"

  "gobot.io/x/gobot"
  "gobot.io/x/gobot/drivers/gpio"
  "gobot.io/x/gobot/platforms/beaglebone"
  "gobot.io/x/gobot/platforms/dragonboard"
  "gobot.io/x/gobot/platforms/raspi"
)

func main() {
  out, err := exec.Command("uname", "-r").Output()
  if err != nil {
    log.Fatal(err)
  }
  var adaptor gobot.Adaptor
  var pin string
  kernelRelease := string(out)
  if strings.Contains(kernelRelease, "raspi2") {
    adaptor = raspi.NewAdaptor()
    pin = "7"
  } else if strings.Contains(kernelRelease, "snapdragon") {
    adaptor = dragonboard.NewAdaptor()
    pin = "GPIO_A"
  } else {
    adaptor = beaglebone.NewAdaptor()
    pin = "P8_7"
  }
  digitalWriter, ok := adaptor.(gpio.DigitalWriter)
  if !ok {
    log.Fatal("Invalid adaptor")
  }
  led := gpio.NewLedDriver(digitalWriter, pin)

  work := func() {
    gobot.Every(1*time.Second, func() {
      led.Toggle()
    })
  }

  robot := gobot.NewRobot("snapbot",
    []gobot.Connection{adaptor},
    []gobot.Device{led},
    work,
  )

  robot.Start()
}

We are basically adding in there a block to select the right adaptor and pin, depending on which board the code is running. Now we can compile this program, throw the binary in the board, and give it a try.

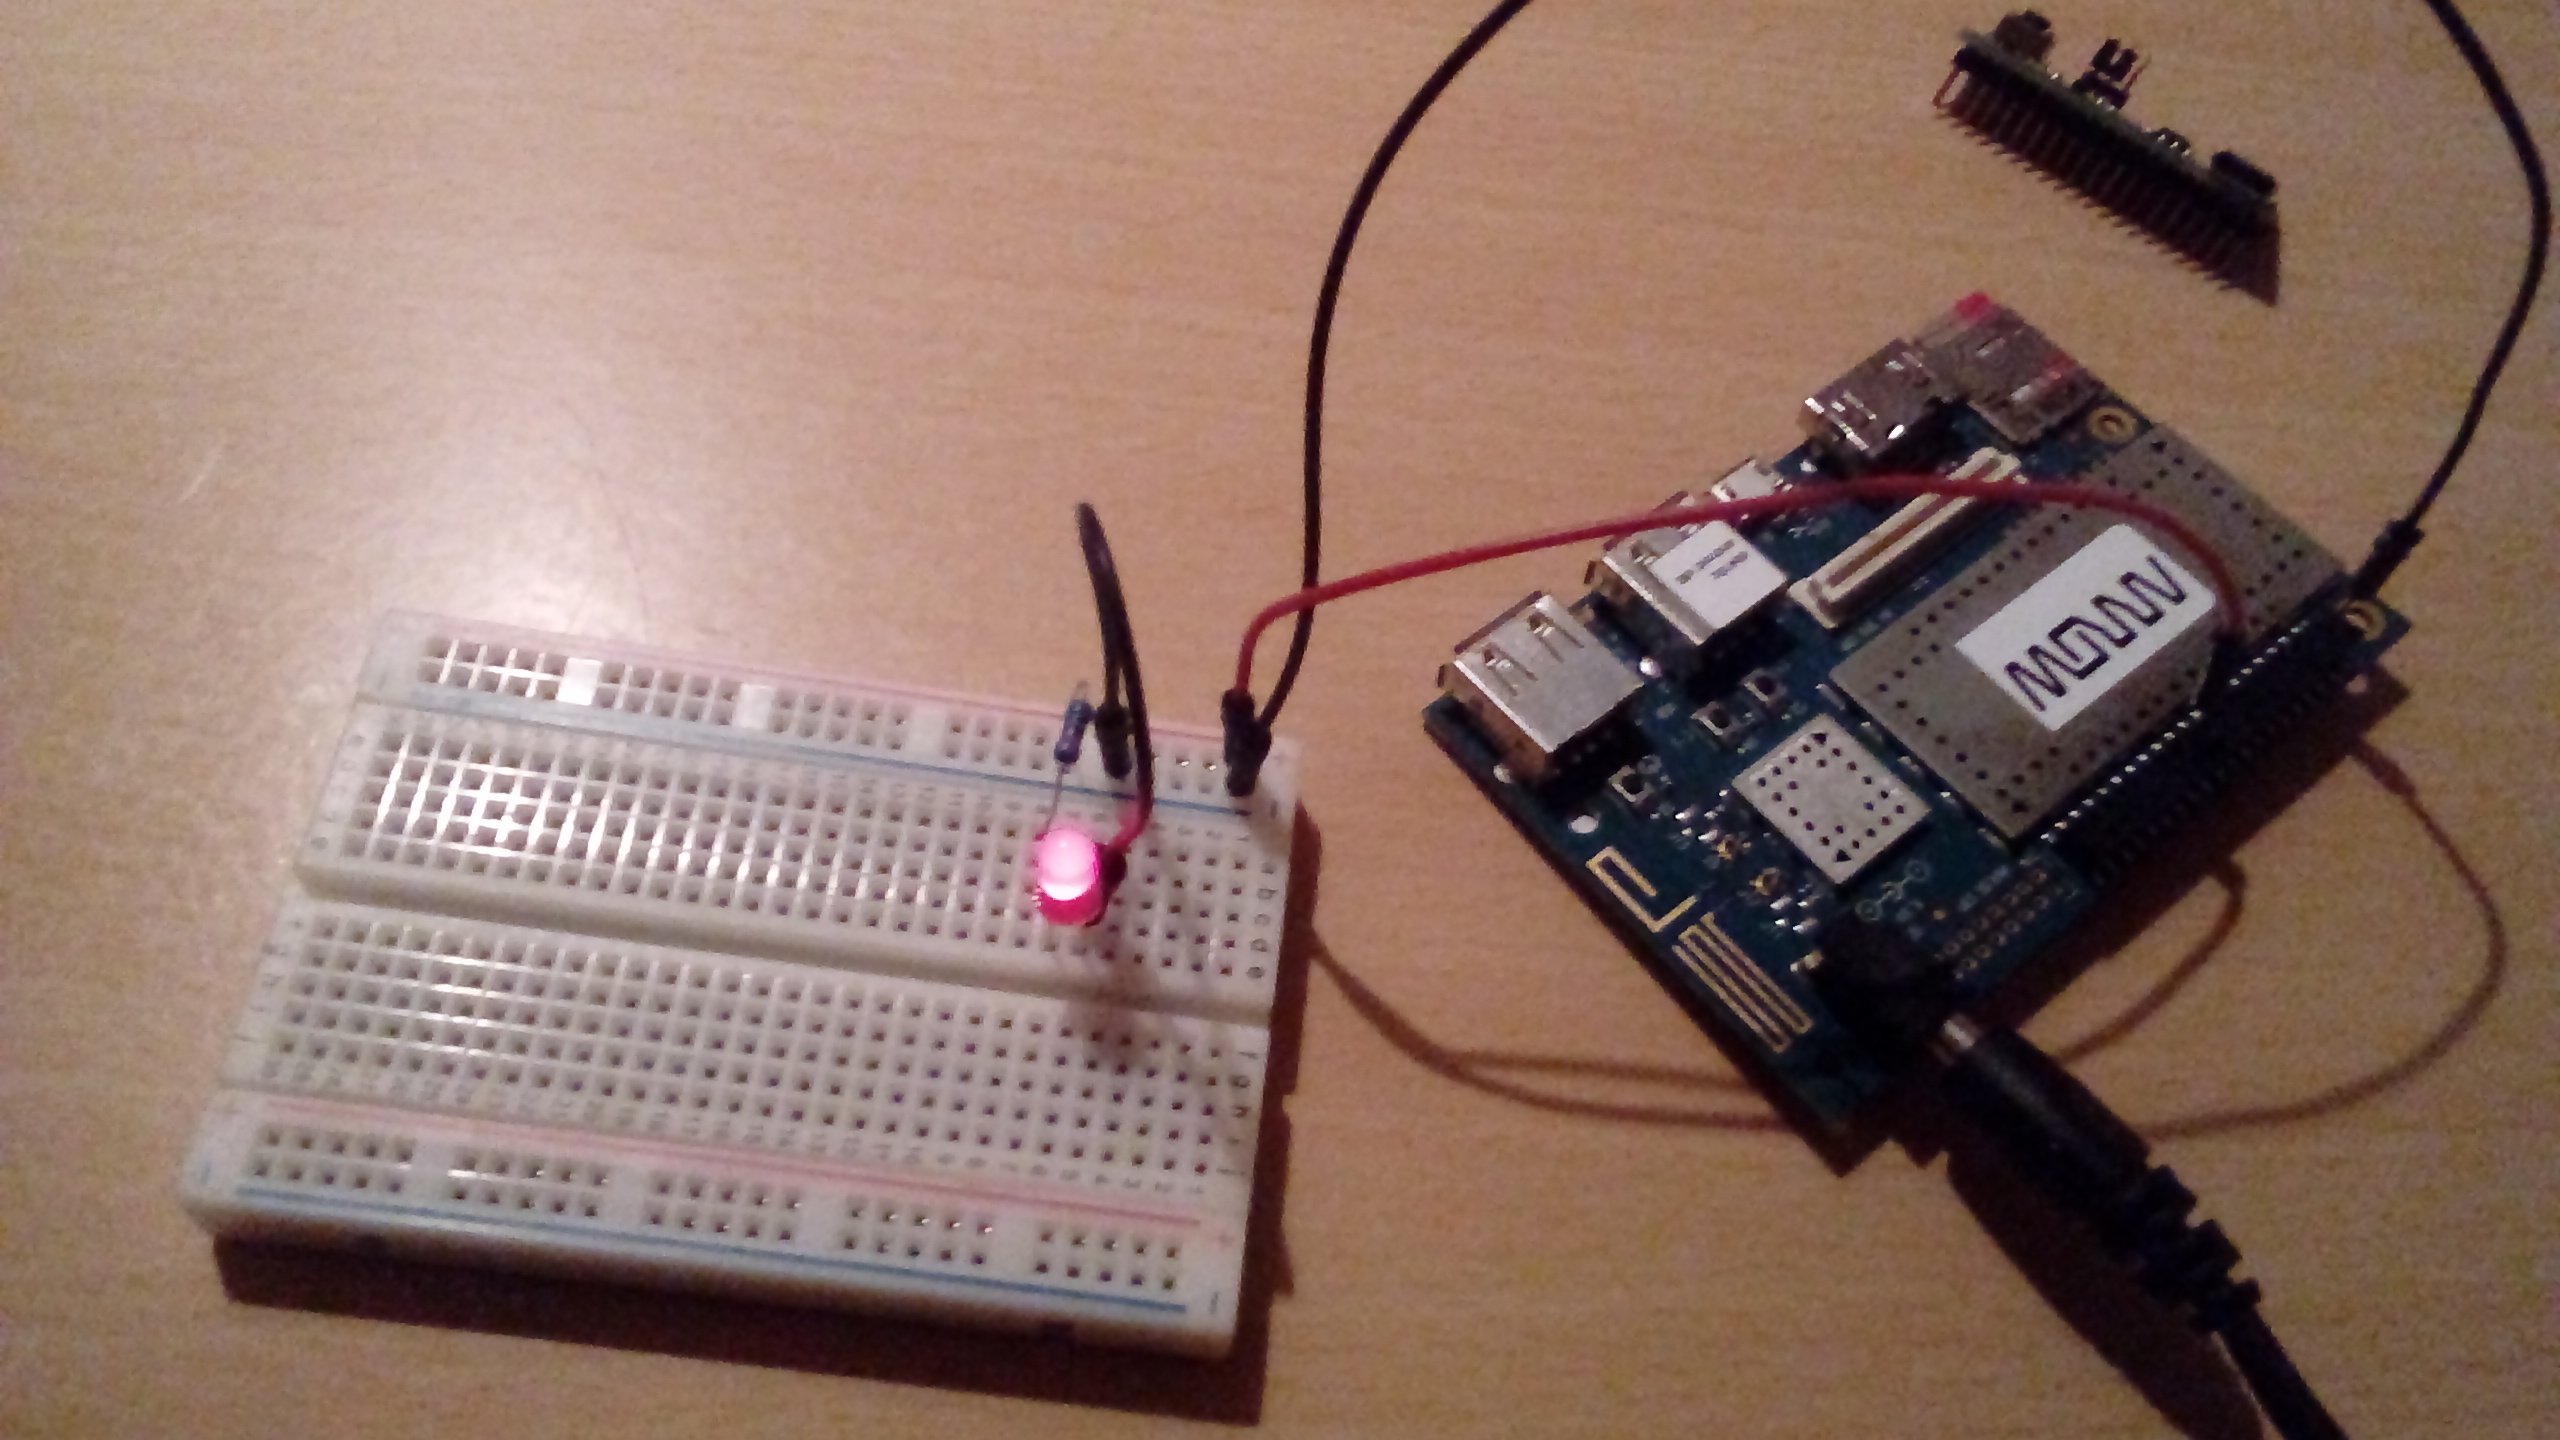
picture of the Dragonboard prototype

But we can do better. If we package this in a snap, anybody with one of the boards and an operating system that supports snaps can easily install it. We also open the door to continuous delivery and crowd testing. And as I said before, super simple, just put this in the snapcraft.yaml file:

name: gobot-blink-elopio
version: master
summary:  Blink snap for the Raspberry Pi with Gobot
description: |
  This is a simple example to blink an LED in the Raspberry Pi
  using the Gobot framework.

confinement: devmode

apps:
  gobot-blink-elopio:
    command: gobot-blink

parts:
  gobot-blink:
    source: .
    plugin: go
    go-importpath: github.com/elopio/gobot-blink

To build the snap, here is a cool trick thanks to the work that kalikiana recently added to snapcraft. I'm writing this code in my development machine, which is amd64. But the raspberry pi and beaglebone are armhf, and the dragonboard is arm64; so I need to cross-compile the code to get binaries for all the architectures:

snapcraft --target-arch=armhf
snapcraft clean
snapcraft --target-arch=arm64

That will leave two .snap files in my working directory that then I can upload to the store with snapcraft push. Or I can just push the code to GitHub and let build.snapcraft.io to take care of building and pushing for me.

Here is the source code for this simple example: https://github.com/elopio/gobot-blink

Of course, Gobot supports many more devices that will let you build complex robots. Just take a look at the documentation in the Gobot site, and at the guide about deployable packages with Gobot and snapcraft.

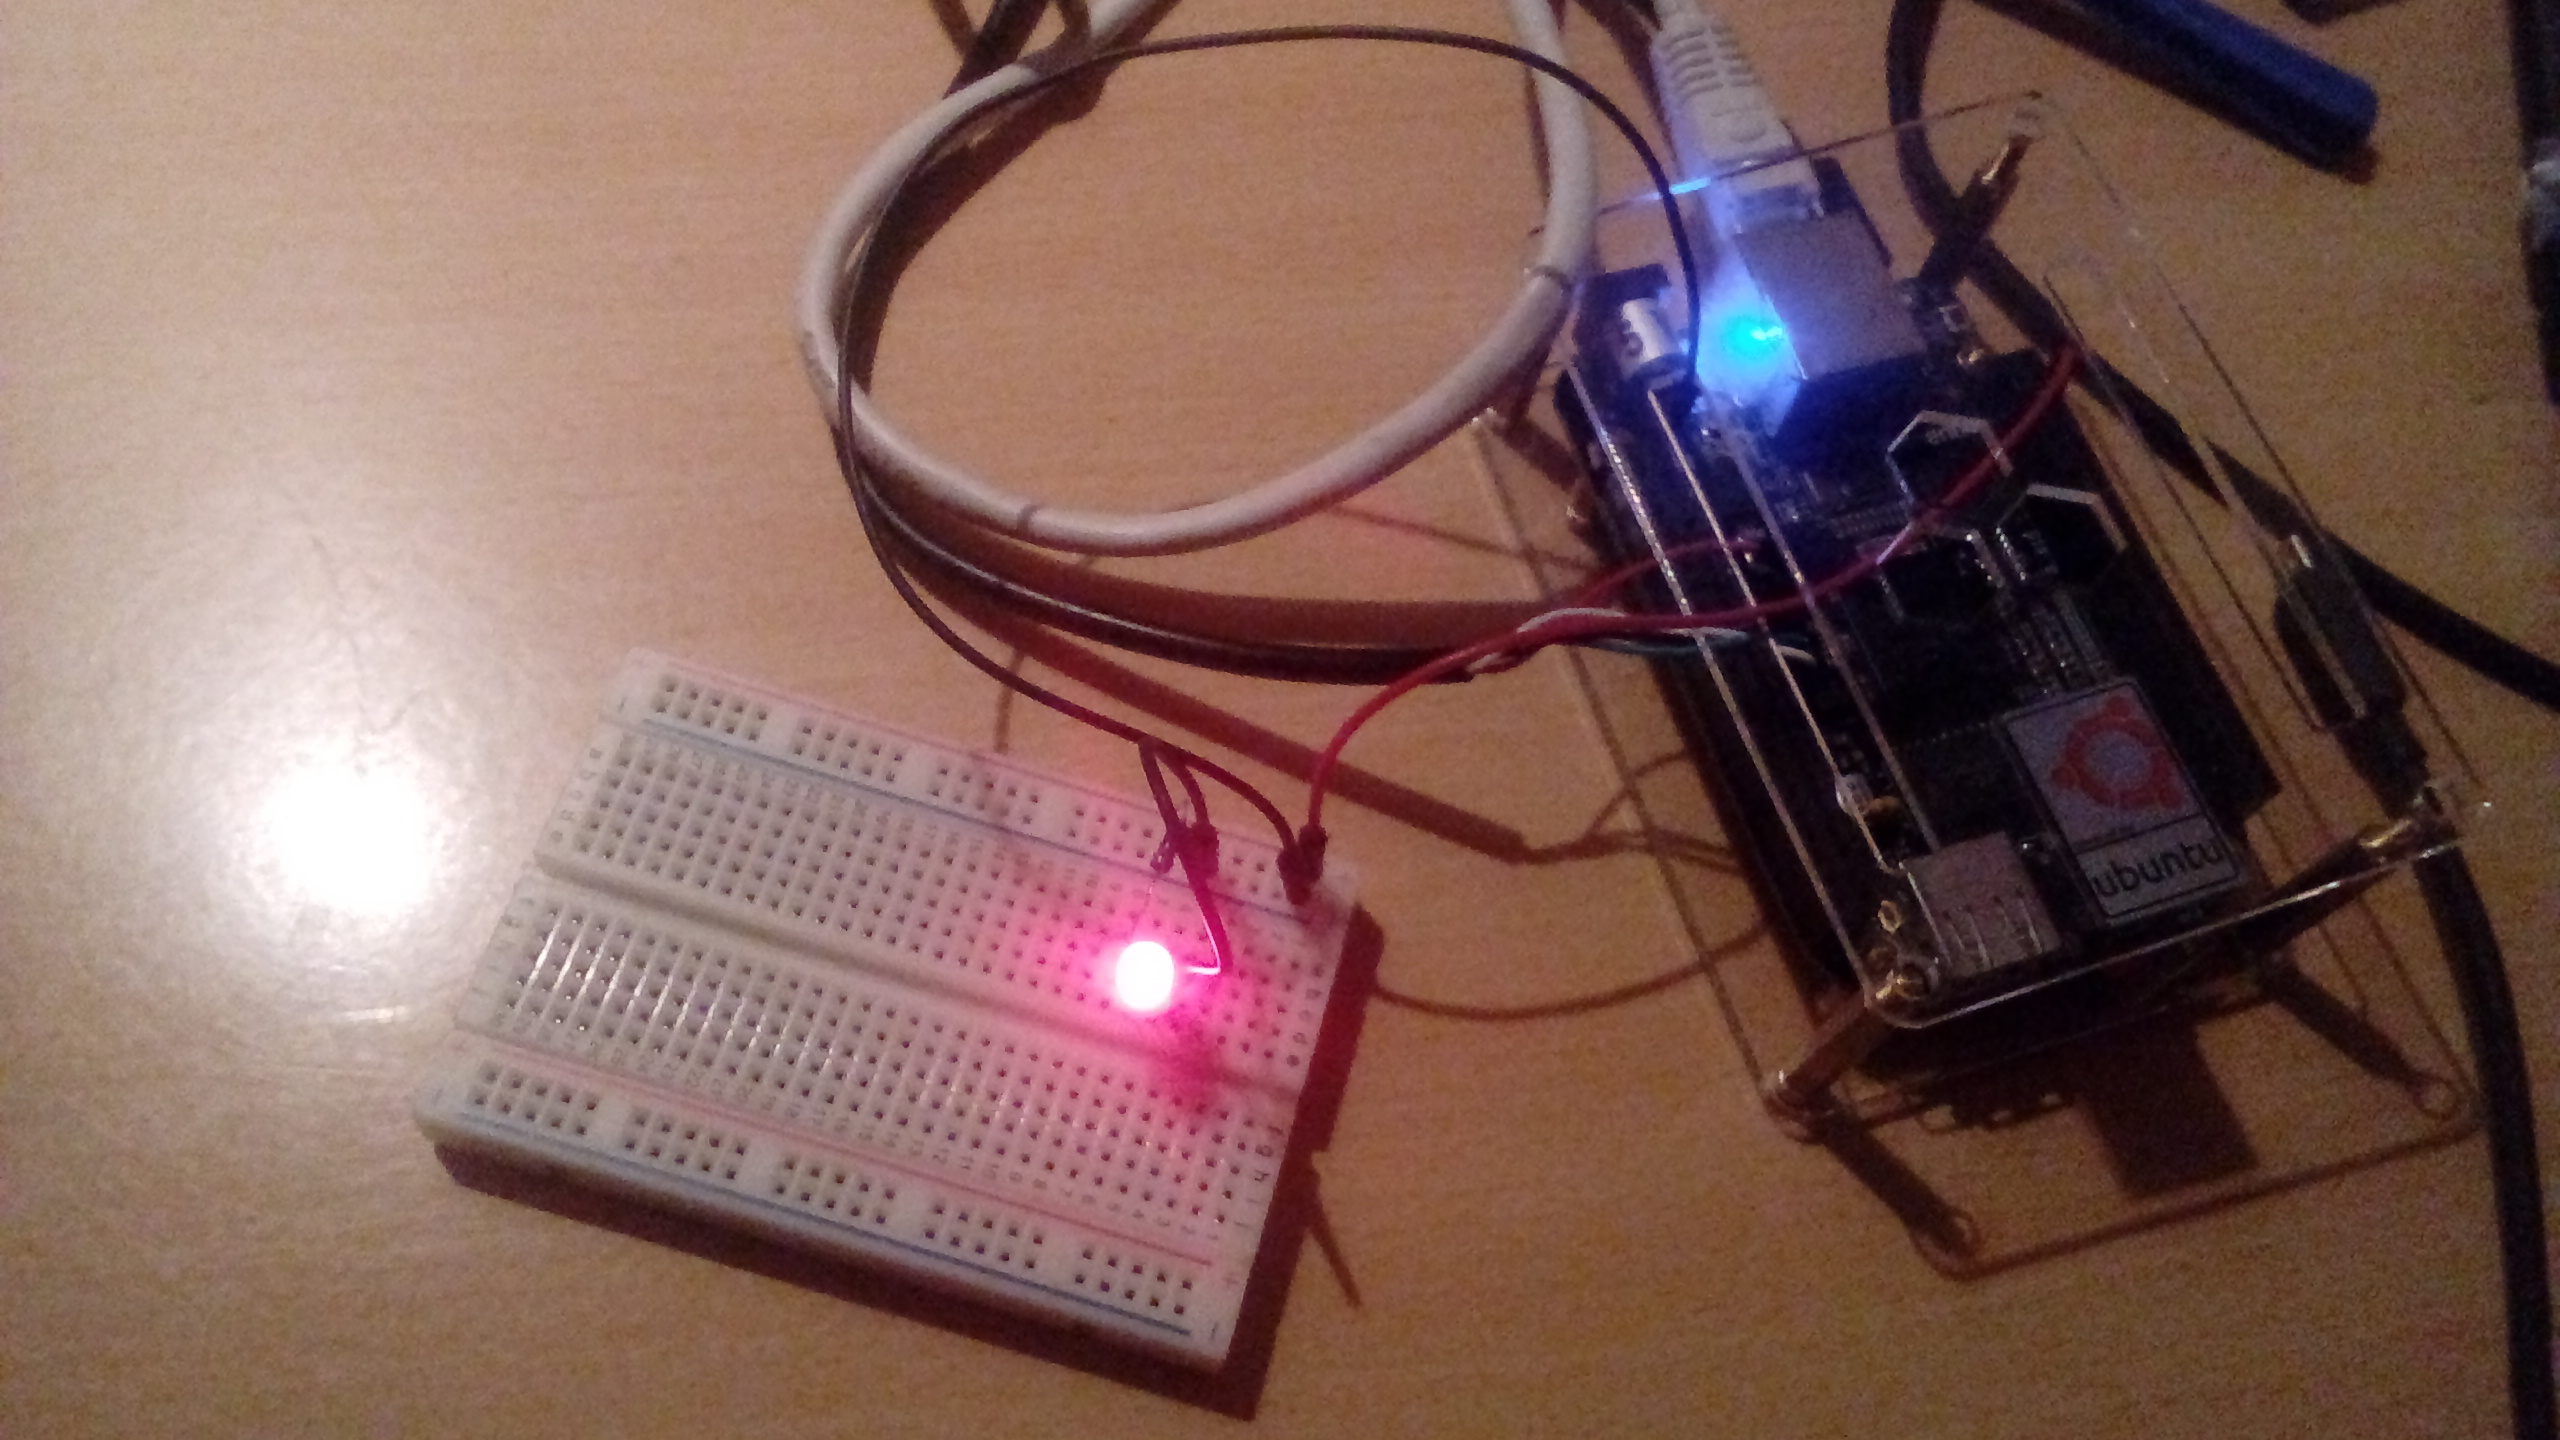
picture of the BeagleBone prototype

If you have one of the boards I'm using here to play, give it a try:

sudo snap install gobot-blink-elopio --edge --devmode
sudo gobot-blink-elopio

Now my experiments will be to try make the snap more secure, with strict confinement. If you have any questions or want to help, we have a topic in the forum.

User acceptance testing of snaps, with Travis

Travis CI offers a great continuous integration service for the projects hosted on GitHub. With it, you can run tests, deliver artifacts and deploy applications every time you push a commit, on pull requests, after they are merged, or with some other frequency.

Last week Travis CI updated the Ubuntu 14.04 (Trusty) machines that run your tests and deployment steps. This update came with a nice surprise for everybody working to deliver software to Linux users, because it is now possible to install snaps in Travis!

I've been excited all week telling people about all the doors that this opens; but if you have been following my adventures in the Ubuntu world, by now you can probably guess that I'm mostly thinking about all the potential this has for automated testing. For the automation of user acceptance tests.

User acceptance tests are executed from the point of view of the user, with your software presented as a black box to them. The tests can only interact with the software through the entry points you define for your users. If it's a CLI application, then the tests will call commands and subcommands and check the outputs. If it's a website or a desktop application, the tests will click things, enter text and check the changes on this GUI. If it's a service with an HTTP API, the tests will make requests and check the responses. On these tests, the closer you can get to simulate the environment and behaviour of your real users, the better.

Snaps are great for the automation of user acceptance tests because they are immutable and they bundle all their dependencies. With this we can make sure that your snap will work the same on any of the operating systems and architectures that support snaps. The snapd service takes care of hiding the differences and presenting a consistent execution environment for the snap. So, getting a green execution of these tests in the Trusty machine of Travis is a pretty good indication that it will work on all the active releases of Ubuntu, Debian, Fedora and even on a Raspberry Pi.

Let me show you an example of what I'm talking about, obviously using my favourite snap called IPFS. There is more information about IPFS in my previous post.

Check below the packaging metadata for the IPFS snap, a single snapcraft.yaml file:

name: ipfs
version: master
summary: global, versioned, peer-to-peer filesystem
description: |
  IPFS combines good ideas from Git, BitTorrent, Kademlia, SFS, and the Web.
  It is like a single bittorrent swarm, exchanging git objects. IPFS provides
  an interface as simple as the HTTP web, but with permanence built in. You
  can also mount the world at /ipfs.
confinement: strict

apps:
  ipfs:
    command: ipfs
    plugs: [home, network, network-bind]

parts:
  ipfs:
    source: https://github.com/ipfs/go-ipfs.git
    plugin: nil
    build-packages: [make, wget]
    prepare: |
      mkdir -p ../go/src/github.com/ipfs/go-ipfs
      cp -R . ../go/src/github.com/ipfs/go-ipfs
    build: |
      env GOPATH=$(pwd)/../go make -C ../go/src/github.com/ipfs/go-ipfs install
    install: |
      mkdir $SNAPCRAFT_PART_INSTALL/bin
      mv ../go/bin/ipfs $SNAPCRAFT_PART_INSTALL/bin/
    after: [go]
  go:
    source-tag: go1.7.5

It's not the most simple snap because they use their own build tool to get the go dependencies and compile; but it's also not too complex. If you are new to snaps and want to understand every detail of this file, or you want to package your own project, the tutorial to create your first snap is a good place to start.

What's important here is that if you run snapcraft using the snapcraft.yaml file above, you will get the IPFS snap. If you install that snap, then you can test it from the point of view of the user. And if the tests work well, you can push it to the edge channel of the Ubuntu store to start the crowdtesting with your community.

We can automate all of this with Travis. The snapcraft.yaml for the project must be already in the GitHub repository, and we will add there a .travis.yml file. They have good docs to prepare your Travis account. First, let's see what's required to build the snap:

sudo: required
services: [docker]

script:
  - docker run -v $(pwd):$(pwd) -w $(pwd) snapcore/snapcraft sh -c "apt update && snapcraft"

For now, we build the snap in a docker container to keep things simple. We have work in progress to be able to install snapcraft in Trusty as a snap, so soon this will be even nicer running everything directly in the Travis machine.

This previous step will leave the packaged .snap file in the current directory. So we can install it adding a few more steps to the Travis script:

[...]

script:
  - docker [...]
  - sudo apt install --yes snapd
  - sudo snap install *.snap --dangerous

And once the snap is installed, we can run it and check that it works as expected. Those checks are our automated user acceptance test. IPFS has a CLI client, so we can just run commands and verify outputs with grep. Or we can get fancier using shunit2 or bats. But the basic idea would be to add to the Travis script something like this:

[...]

script:
  [...]
  - /snap/bin/ipfs init
  - /snap/bin/ipfs cat /ipfs/QmVLDAhCY3X9P2uRudKAryuQFPM5zqA3Yij1dY8FpGbL7T/readme | grep -z "^Hello and Welcome to IPFS!.*$"
  - [...]

If one of those checks fail, Travis will mark the execution as failed and stop our release process until we fix them. If instead, all of the checks pass, then this version is good enough to put into the store, where people can take it and run exploratory tests to try to find problems caused by weird scenarios that we missed in the automation. To help with that we have the snapcraft enable-ci travis command, and a tutorial to guide you step by step setting up the continuous delivery from Travis CI.

For the IPFS snap we had for a long time a manual smoke suite, that our amazing community of testers have been executing over and over again, every time we want to publish a new release. I've turned it into a simple bash script that from now on will be executed frequently by Travis, and will tell us if there's something wrong before anybody gives it a try manually. With this our community of testers will have more time to run new and interesting scenarios, trying to break the application in clever ways, instead of running the same repetitive steps many times.

Thanks to Travis and snapcraft we no longer have to worry about a big part of or release process. Continuous integration and delivery can be fully automated, and we will have to take a look only when something breaks.

As for IPFS, it will keep being my guinea pig to guide new features for snapcraft and showcase them when ready. It has many more commands that have to be added to the automated test suite, and it also has a web UI and an HTTP API. Lots of things to play with! If you would like to help, and on the way learn about snaps, automation and the decentralized web, please let me know. You can take a look on my IPFS snap repo for more details about testing snaps in Travis, and other tricks for the build and deployment.

screenshot of the IPFS smoke test running in travis

Crowdtesting with the Ubuntu community: the case of IPFS

Here at Ubuntu we are working hard on the future of free software distribution. We want developers to release their software to any Linux distro in a way that's safe, simple and flexible. You can read more about this at snapcraft.io.

This work is extremely fun because we have to work constantly with a wild variety of free software projects to make sure that the tools we write are usable and that the workflow we are proposing makes sense to developers and gives them a lot of value in return. Today I want to talk about one of those projects: IPFS.

IPFS is the permanent and decentralized web. How cool is that? You get a peer-to-peer distributed file system where you store and retrieve files. They have a nice demo in their website, and you can give it a try on Ubuntu Trusty, Xenial or later by running:

$ sudo snap install ipfs

screenshot of the IPFS peers

So, here's one of the problems we are trying to solve. We have millions of users on the Trusty version of Ubuntu, released during 2014. We also have millions of users on the Xenial version, released during 2016. Those two versions are stable now, and following the Ubuntu policies, they will get only security updates for 5 years. That means that it's very hard, almost impossible, for a young project like IPFS to get into the Ubuntu archives for those releases. There will be no simple way for all those users to enjoy IPFS, they would have to use a Personal Package Archive or install the software from a tarball. Both methods are complex with high security risks, and both require the users to put a lot of trust on the developers, more than what they should ever trust anybody.

We are closing the Zesty release cycle which will go out in April, so it's too late there too. IPFS could make a deb, put it into Debian, wait for it to sync to Ubuntu, and then it's likely that it will be ready for the October release. Aside from the fact that we have to wait until October, there are a few other problems. First, making a deb is not simple. It's not too hard either, but it requires quite some time to learn to do it right. Second, I mentioned that IPFS is young, they are on the 0.4.6 version. So, it's very unlikely that they will want to support this early version for such a long time as Debian and Ubuntu require. And they are not only young, they are also fast. They add new features and bug fixes every day and make new releases almost every week, so they need a feedback loop that's just as fast. A 6 months release cycle is way too slow. That works nicely for some kinds of free software projects, but not for one like IPFS.

They have been kind enough to let me play with their project and use it as a test subject to verify our end-to-end workflow. My passion is testing, so I have been focusing on continuous delivery to get happy early adopters and constant feedback about the most recent changes in the project.

I started by making a snapcraft.yaml file that contains all the metadata required for the snap package. The file is pretty simple and to make the first version it took me just a couple of minutes, true story. Since then I've been slowly improving and updating it with small changes. If you are interested in doing the same for your project, you can read the tutorial to create a snap.

I built and tested this snap locally on my machines. It worked nicely, so I pushed it to the edge channel of the Ubuntu Store. Here, the snap is not visible on user searches, only the people who know about the snap will be able to install it. I told a couple of my friends to give it a try, and they came back telling me how cool IPFS was. Great choice for my first test subject, no doubt.

At this point, following the pace of the project by manually building and pushing new versions to the store was too demanding, they go too fast. So, I started working on continuous delivery by translating everything I did manually into scripts and hooking them to travis-ci. After a few days, it got pretty fancy, take a look at the github repo of the IPFS snap if you are curious. Every day, a new version is packaged from the latest state of the master branch of IPFS and it is pushed to the edge channel, so we have a constant flow of new releases for hardcore early adopters. After they install IPFS from the edge channel once, the package will be automatically updated in their machines every day, so they don't have to do anything else, just use IPFS as they normally would.

Now with this constant stream of updates, me and my two friends were not enough to validate all the new features. We could never be sure if the project was stable enough to be pushed to the stable channel and make it available to the millions and millions of Ubuntu users out there.

Luckily, the Ubuntu community is huge, and they are very nice people. It was time to use the wisdom of the crowds. I invited the most brave of them to keep the snap installed from edge and I defined a simple pipeline that leads to the stable release using the four available channels in the Ubuntu store:

  • When a revision is tagged in the IPFS master repo, it is automatically pushed to edge channel from travis, just as with any other revision.
  • Travis notifies me about this revision.
  • I install this tagged revision from edge, and run a super quick test to make sure that the IPFS server starts.
  • If it starts, I push the snap to the beta channel.
  • With a couple of my friends, we run a suite of smoke tests.
  • If everything goes well, I push the snap to the candidate channel.
  • I notify the community of Ubuntu testers about a new version in the candidate channel. This is were the magic of crowd testing happens.
  • The Ubuntu testers run the smoke tests in all their machines, which gives us the confidence we need because we are confirming that the new version works on different platforms, distros, distro releases, countries, network topologies, you name it.
  • This candidate release is left for some time in this channel, to let the community run thorough exploratory tests, trying to find weird usage combinations that could break the software.
  • If the tag was for a final upstream release, the community also runs update tests to make sure that the users with the stable snap installed will get this new version without issues.
  • After all the problems found by the community have been resolved or at least acknowledged and triaged as not blockers, I move the snap from candidate to the stable channel.
  • All the users following the stable channel will automatically get a very well tested version, thanks to the community who contributed with the testing and accepted a higher level of risk.
  • And we start again, the never-ending cycle of making free software :)

Now, let's go back to the discussion about trust. Debian and Ubuntu, and most of the other distros, rely on maintainers and distro developers to package and review every change on the software that they put in their archives. That is a lot of work, and it slows down the feedback loop a lot, as we have seen. In here we automated most of the tasks of a distro maintainer, and the new revisions can be delivered directly to the users without any reviews. So the users are trusting directly their upstream developers without intermediaries, but it's very different from the previously existing and unsafe methods. The code of snaps is installed read-only, very well constrained with access only to their own safe space. Any other access needs to be declared by the snap, and the user is always in control of which access is permitted to the application.

This way upstream developers can go faster but without exposing their users to unnecessary risks. And they just need a simple snapcraft.yaml file and to define their own continuous delivery pipeline, on their own timeline.

By removing the distro as the intermediary between the developers and their users, we are also making a new world full of possibilities for the Ubuntu community. Now they can collaborate constantly and directly with upstream developers, closing this quick feedback loop. In the future we will tell our children of the good old days when we had to report a bug in Ubuntu, which would be copied to Debian, then sent upstream to the developers, and after 6 months, the fix would arrive. It was fun, and it lead us to where we are today, but I will not miss it at all.

Finally, what's next for IPFS? After this experiment we got more than 200 unique testers and almost 300 test installs. I now have great confidence on this workflow, new revisions were delivered on time, existing Ubuntu testers became new IPFS contributors and I now can safely recommend IPFS users to install the stable snap. But there's still plenty of work ahead. There are still manual steps in the pipeline that can be scripted, the smoke tests can be automated to leave more free time for exploratory testing, we can release also to armhf and arm64 architectures to get IPFS into the IoT world, and well, of course the developers are not stopping, they keep releasing new interesting features. As I said, plenty of opportunities for us as distro contributors.

screenshot of the IPFS snap stats

I'd like to thank everybody who tested the IPFS snap, specially the following people for their help and feedback:

  • freekvh
  • urcminister
  • Carla Sella
  • casept
  • Colin Law
  • ventrical
  • cariboo
  • howefield

<3

If you want to release your project to the Ubuntu store, take a look at the snapcraft docs, the Ubuntu tutorials, and come talk to us in Rocket Chat.